May 19, 2011

Bloomin' backyard


Hello again, everyone! I hope your week's going well.

Earlier this month, I did a little house tour to show you all what the place looks like six months after we bought the house, and promised an outside tour. Well, the weather hasn't really been conducive to being outside...


This has been our forecast for practically two weeks. (I'm not complaining, though, with all the severe weather facing other parts of the country. My heart goes out to everyone affected by it). But I did manage to get a break in the rain to take a few photos.

Our outdoor projects have mostly consisted of weeding the gardens, trimming bushes and seeding the lawn. We decided not to do too much to the yard this year, instead taking a wait-and-see approach -- wait and see what comes up throughout the season before making changes. Instead, we planted some flowers and veggies in containers to add some more color and give us a chance to practice our green thumbs.

Remember that metal bucket I rescued from the dumpster? 

No, I did NOT actually pull it from the dumpster, but it was headed for the trash

Well, I turned it into a planter! It already had holes drilled in the bottom, so I just added some soil and flowers. And it already had such a great weathered look, so I didn't have to beat it up myself. Gah, it's so cute! If only my flowers would bloom a little and show off their cuteness.


I picked out a bunch of sun-loving flowers from Lowe's in shades of purple: 

Petunias...


Violas... 


and dianthus. 


And I added some dusty miller for a little variety. 


The lack of sun has kept the flowers from really blooming, I think. The title of this post is a little ambitious, maybe...

Hanging out on the deck with my cutie-patootie planter are a pair of dahlias I still haven't repotted yet (they were an impulse buy last week!) They're one of my favorite flowers to grow every summer. They just make me so happy and do so well in lots of sun, which our deck gets -- when it's not pouring rain for a week straight, that is. 


I also planted the purple flowers in a pair of terra cotta-colored pots I had lying around. They flank the stairs leading up to our deck. They are looking a little sad, though, huh? I hope they perk up...


I even had enough flowers to fill a couple bigger planters we bought for our wedding. They greet us when we drive up to the garage. These puppies look a little more lively!


Spy those pots way in the back, next to the shed? That's where we planted some veggies -- green peppers, tomatoes and cauliflower. We've grown veggies in pots before and had moderate luck, so we'll see how these do. This is our first time trying cauliflower, though. Fingers crossed!


And those are all the plants we can take credit for -- the rest came with the house. We discovered our front garden has daffodils, bright red tulips and I think the purple flowers are flox. I'm loving the colors! And all we had to do was sit there and watch it grow.

The daffodils bloomed first...


Then the tulips...


And now the daffodils are on their way out, but the flox is going crazy, as in, taking over our walkway crazy. We were going to cut them back, but the hubs is madly in love with those purple flowers (don't tell him I told you!). Eh, we never use our front door anyways, so no need to preserve the walking space.


Please excuse these less-than-stellar phone photos. I didn't get any sunny photos with my camera.

The side garden next to the shed isn't quite as colorful yet, but we're anxiously waiting to see what comes up. So far we have lots of green stuff and a brave little tulip that managed to grow in a crack in a garden stone. 


In case you're curious, that stone is a medallion for the U.S. Navy left over from the previous owner. Go Navy!

So that's a mini tour of our yard and what we have growing so far. I'd love to get really down and dirty in the yard, but for now I'm content to enjoy a few planters and wait and see what our gardens have to offer this summer.

I also realllly want to jazz up our deck. We have a nice little patio set, but we need an umbrella and some colorful outdoor cushions, don't you think? Maybe I'll make them with my awesome mediocre sewing skills. (I'm still working on that sewing project I mentioned before...it's taking forever! I promise to show it to you soon).

This was taken pre-flowers and pre-deluge, obviously. I miss the sun...

And we have a fire pit we bought at L.L.Bean that I'm dying to use. Take the fire pit, add an umbrella, some pillows, maybe some string lights and accessories, and BAM! We'll have an awesome hangout space, like this one. Isn't it dreamy? I love the colors and the lanterns. I can dream...


Okay, we won't actually use the fire pit on our deck, because that's probably bad for it, considering the fire pit gets hot underneath. Wouldn't want to set our deck on fire!

I cannot WAIT for summer! Heck, at this point I'll even take spring. Mid-50s and rain? That's so last month. The rain is supposed to stop Sunday...but I'm not going to hold my breath. :)

Later this morning I'll be linking up to the Outdoor Projects link party at Centsational Girl! It's part of the Home May'd link party series (you can see my contribution to the first party, spray paint projects, here). Stop by and get a taste of summer! I love seeing what's growing already in other parts of the country where it's full-on spring. The big start of the growing season is nearly upon us here in Maine, so we'll catch up very soon, I hope!

May 17, 2011

Spray painted pedestal bowl

Two posts in two days, holy cow! I'm such an overachiever! You all must be special :)

Actually, I really wanted to participate in this Home May'd link party on spray paint projects. It's the first in a series of summer-themed parties, and was the kick in the booty I needed to get over my spray paint fear. The truth is, I bought the spray paint like three months ago but never got around to using it. I'd never used spray paint before (nope, no teenage-angsty tagging for me!), and I was sceeeeered. But thanks to this link party, I decided to just suck it up and do it!

Enter: the wire pedestal bowl.


It was my mom's and she wasn't using it, so she gave it to me. I put Christmas ornaments in it during the holidays, but since then it's sat in my closet. I decided it needed a little facelift -- the dark bronze color wasn't doing it for me.

So I whipped out my mini can of Krylon Short Cuts in Antique Bronze.


I mostly followed the directions on the can. I gave the whole thing a light sand to help give the paint something to adhere to. While most of it is metal, the rim is kind of wood or wicker material.


Then, I fashioned myself a little spray-painting booth using a couple old boxes.


I set up shop in the basement, but then I started imagining spray paint floating through the air and contaminating the hubs' home brewing setup, and I got nervous. Even though it was a little damp outside, I moved everything onto the grass to do the spraying.

I let it dry for about an hour, then sprayed it again. A couple hours later and it was dry to the touch, so I brought it in and gave it a new home on our dining room table.

Voila!


Pretty cute, huh? I love its shape, especially the base. I filled it with these little birch pieces that were left over from our wedding decorations for a simple but rustic look.

Overall, I'm happy with my first spray-painting project. It's not perfect -- one side of the bottom is a little cracked. Maybe I should have primed it, or cleaned it better. I'm sure the damp weather didn't help either. But I don't mind. It's not that noticeable and this bowl probably won't be out all the time, so I don't think I'll bother to sand it down and repaint. The original metal was also kind of beat up, which is why you can see a few bumps and bubbles.


It also looks good with my new zinc letters!


All in all, it was pretty quick and easy -- I can see the appeal of that. But I didn't enjoy the fumes at all, and I couldn't stop thinking about what dangerous chemicals I was exposing myself to, even though I did my best to keep my distance. I'll probably use spray paint again, but I won't be using it all the time.

Linking up to Sarah @ Thrify Decor Chick's Spray Paint Party! There are almost 200 projects linked up already -- go and check them out!


And if you want to find out how to really spray paint something (instead of just winging it like me), check out Centsational Girl's FAQ. Seriously, she is the queen of spray paint!

I'm also linking up to Metamorphosis Monday at Between Naps on the Porch!


In other news, the hubs and I finally booked our hotels for our anniversary vacation next month! (Procrastinate much??). We'll be spending two nights camping out in Vermont for a friend's wedding. Our anniversary night, we'll be in Burlington, at a Marriott next to Lake Champlain (and we're using Marriott points, so it's free, yay!). 

Then we're off to Quebec City for three nights. We booked this adorable little hotel in the old part of the city. I think my favorite part is that they hang a little basket of pastries, fruit and juice on your door every morning. LOVE it! I am so excited to walk around the old city, walking around the little streets, eating, window shopping, going to museums, eating...wait, did I already say eating...?? :) 


If you have any recommendations for places to eat or things to do in Quebec City, or even Burlington, I'd love to hear them! 

May 16, 2011

Weekend finds

It's Monday again, people. Crazy how it comes around every week! If you had trouble reading or commenting at the end of last week, it's because Blogger was down, and my most recent post was temporarily taken down (along with everyone else's). While it's back up now, all the comments are gone...boo. But thanks for all your kind words on our wedding photo display! I will feel no shame, now, in staring at myself...  :)

I spent the soggy weekend on a girls' getaway with two of my very best friends. We ate lots of great food, watched girlie movies and did lots of talking and laughing -- a truly perfect girls' weekend! We also did a little shopping around Kennebunkport, a coastal southern Maine town popular with tourists. Many of the stores are, how do you say, priced for the tourists (okay, way out of our price range), but I did find a couple affordable things I couldn't pass up.


These zinc letters were $6 each at a store called Abacus Gallery, and are the hubs' and my first initials. Anthropologie sells some larger zinc letters for $18 a piece, so I'm happy with my find. (I like my font better!)


I spent $12 on this old-looking wire basket at a store called Beach Grass. I don't know if it's actually old (or French, as the label suggested), but I'm still digging it.

What am I going to do with these? I'm not 100% sure yet, but I'm planning to redo all my spring decorating very soon with some summery vignettes, and I think they'll both find a place. Maybe some summer decorating will end this rain and bring us some sun!

UPDATE: Sorry if you received the wedding photo display post twice in your reader. The Blogger trouble corrupted my labels, and when I tried to fix it, it re-published the post with a date-stamp of today instead of the day it originally went live. My apologies!

May 12, 2011

We're so vain: Displaying wedding photos


The hubs and I love to look at ourselves. A lot. Okay, not really, but I do love looking at our wedding photos, even 11 months (to the day!) later. When we first moved into the house, we felt weird about putting wedding photos up -- like it was vain. But heck, we spent all that money on the day and while I'm not going to bust out the "best day of my life" cliche, it was a pretty darn good time. Plus, our photographer Clare Norton took absolutely fantabulous photos that really go to waste just sitting on my hard drive.

I know some people probably feel that wedding photos are best left to a bedroom or another private area, and I totally get that. But I love having the photos around as reminders, and I like looking at other people's wedding photos when I visit them.

It still took us a little while to figure out how to display the photos. A blank wall next to the front door ended up being the perfect spot for a three-photo vertical frame we got as a wedding present. I opted to pick three photos that were more natural looking, not too posed and not just close-ups. You know, so people wouldn't feel overloaded by smiling happy wedding people. They're on the right in the photo below.


I also keep a photo on my bureau, in a Lenox True Love 5 x 7 frame. A cute story: We registered for and received a couple of these in 8 x 10. The hubs went out about bought the 5 x7 one and had it engraved with our names and wedding date as a surprise to me. He then put it back in its box and "hid" it in a big box with the other frames we got as wedding presents (but hadn't opened yet). I decided to do some unpacking and started opening all the frame boxes, and found one that had been engraved. 

Thinking a guest had done it, I felt super bad that we'd written someone a thank-you note and failed to mention the engraving. When I told hubby about it, he said HE actually did it. Woops. But it was still a very sweet surprise. The frame is reflective so it's hard to see the engraving, but it's on the top and bottom.


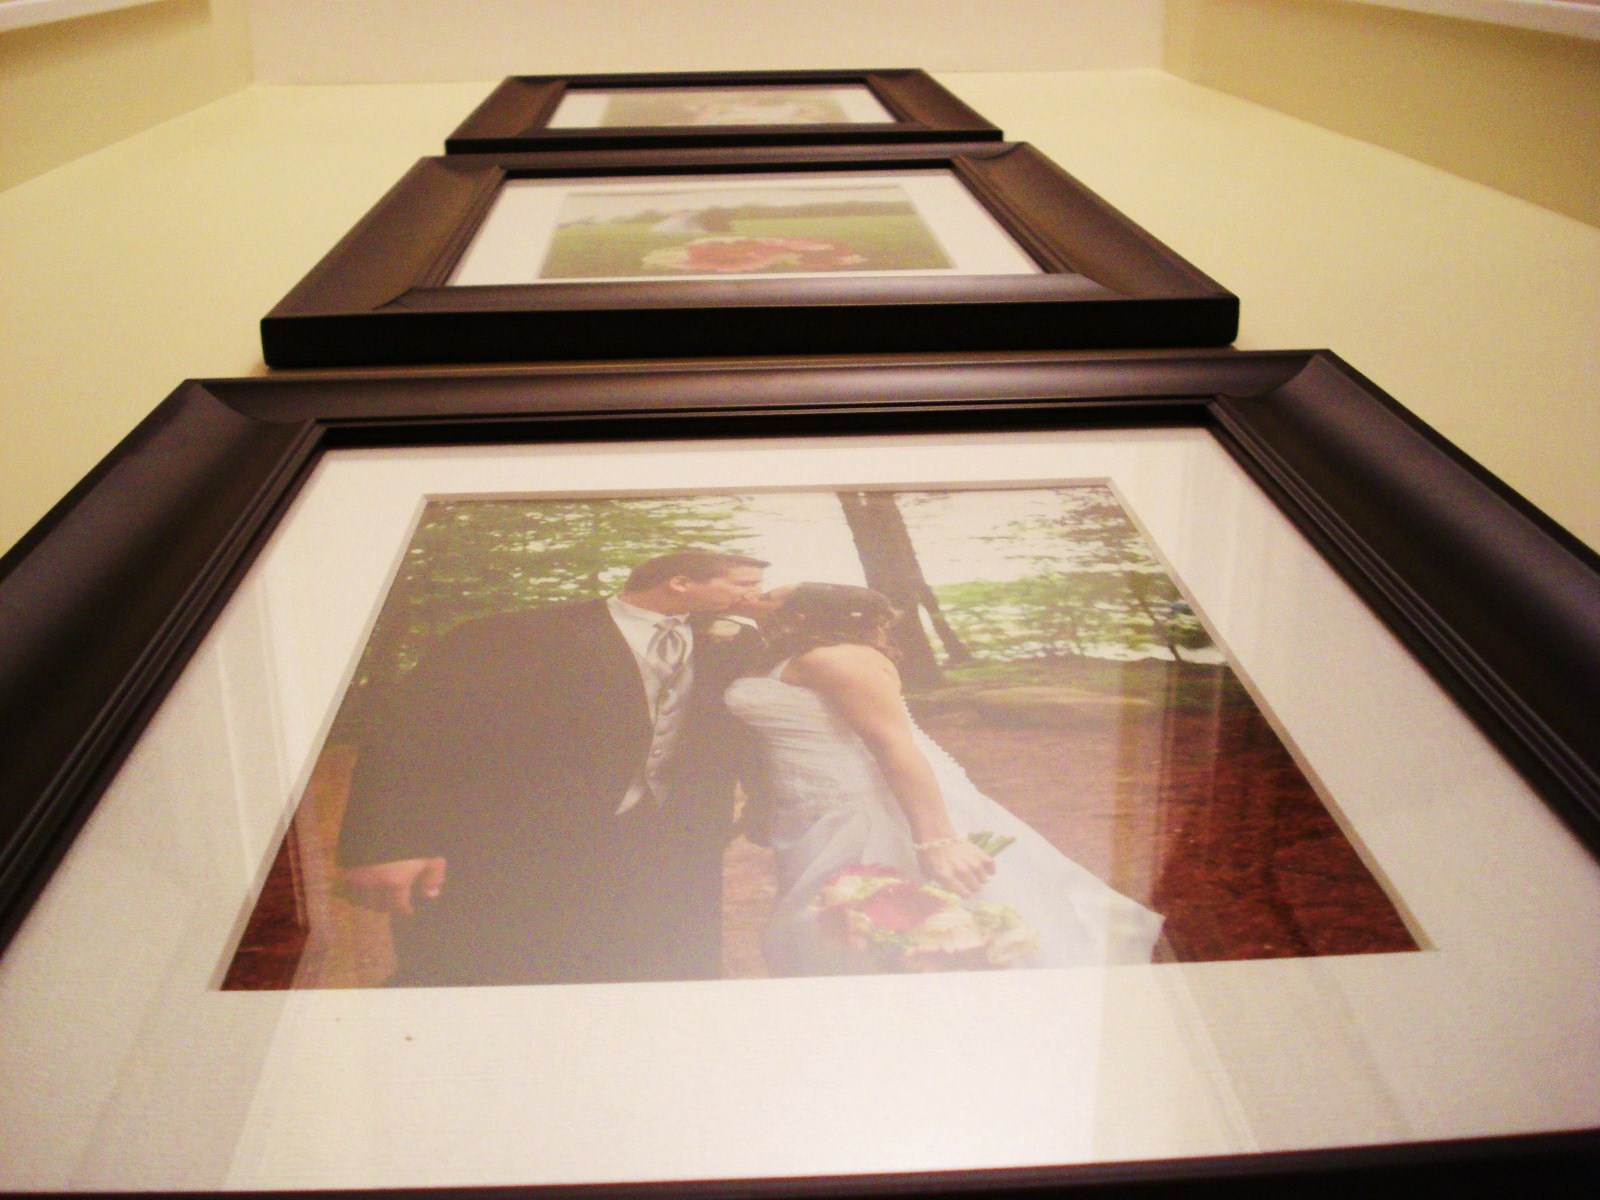
But this still wasn't enough wedding for me (crazy!). So, when I saw F & S's gorgeous wedding photo display at Our Little Beehive, I knew I wanted to do something similar in our empty upstairs hallway. I bought three frames at Michaels for 40% off and printed off three of my favorite photos using Shutterfly.

To hang the photos, I used my tried-and-true paper template method. I started by placing the one in the middle. It looked weird to center it vertically, so I just kind of eye-balled how high I thought looked natural (a little below eye level). Then, I put up the templates for the other two frames, focusing on keeping the spacing even between the frames. Sorry, no photos of the process, but it's pretty similar to how I made my map wall and gallery wall.

I got out my hammer, level, tape measure and picture hangers and got to work. Starting with the middle frame, I measured to make sure it would be centered horizontally. Once I got that one up and level, I used it as a guide to measure where the hooks for the bottom one should be, then the top one. I was ridiculously proud of myself for getting all three frames even and level without even making one errant hole in the wall!


(Is it wrong that all the wedding photos we display are just of the two of us -- no family, no guests?? Maybe we really are vain...)

I picked three photos that I thought had similar coloring; each one had lots of vivid green, which really makes me feel cheerful. Again, I avoided the posed formals and went with more natural ones to keep the arrangement from being too formal.


This wall is the end of our upstairs hallway and directly across from our bedroom door, so we get to look at these photos every time we leave the bedroom. Love it! We saved the bigger photos for a more private area of the house; we're the only two who regularly go upstairs, so it's mostly for us.

But once it was up, the hubs (who was really hesitant about putting big wedding photos up) said it looked so good we should move it to the living room so everyone can see it. But after all that successful measuring and nailing, I wasn't about to take it all down and press my luck by trying to do it again. Also, we don't have the paint for the upstairs hallway, so no way to patch the holes I made without repainting the whole thing. And I'm all set with painting for a while after our double-round in the office.

Speaking of the office, we did go buy our desk. But after the hubs spent two hours assembling it (and didn't even finish!), we encountered this:


If it were in the back or underneath, we may have overlooked it. But this is front and center. Luckily, the manufacturer, Sauder, has a five-year warranty and lets you order replacement parts online. In less than five minutes, I ordered a replacement top that should be delivered right to our house in just a few days. Between that and our purple paint mishap, I guess we should just assume this office makeover is cursed.

But going back to photos -- I do plan on turning the whole upstairs hallway into a family photo gallery, putting up photos, both current and old, of our families. And I'm still planning to do photo ledges in the dining room and would love to showcase more photos of our family and friends, not just the two of us. That redeems our wedding photo vanity, right?? :)

May 10, 2011

Revisiting the office paint color

Happy Tuesday, all! I hope all you moms had a great Mother's Day!

I've got a couple projects in the works and am hoping to show them to you soon. Thanks for your patience. :)

I showed off our repainted office in our six-month house tour, but I wanted to show you some more photos of the finished product. In case you're new here, we painted our pink office gray a few weeks ago....except it came out a little too purple (we painted it Gentle Rain by Behr). We tried to like it, but all we could see was lavender, so we got like 200 more swatches and finally picked another color -- Porch Grey by Valspar. 

And we love. love. LOVE it! It's got a tinge of green, which coordinates well with the green-gray color in the kitchen and hallway. And the green base helps keep it from looking purple.

We haven't done much to the office since painting it -- we haven't even moved the desk back from the center of the room, so please excuse the mess. But here's the new color, in a few lights.


And in case you didn't believe me before that the first gray looked a little purple, here's a comparison for you. 
I know it doesn't seem like a big difference, but trust me -- it's enough to totally change how the room looks. Or at least how I feel about it, which is really what matters, right? 

I was not jazzed to repaint this room, so I whined enough to get the hubs to help me tape and cut in, which meant we easily got it done in a day. We used Valspar Hi-Def paint from Lowe's, the first time we've strayed from our usual Behr paint-and-primer-in-one. I really liked how the Valspar went on, and I think it covered even better than the Behr. I might be a convert...

What do you think? I'm totally loving the new color -- it's just what I pictured. I can't wait to buy our desk (which I think we are doing TO-NIGHT!) and start putting the room back together.

And the office mood board, as a reminder...


Have any paint mishaps? Don't be afraid...share 'em!

Oh, and the lovely Christina has featured another of my projects -- the repurposed lemonade bottles! You have to stop by Christina's Adventures and see the other projects she featured from her 20 Below Thursday party. They include a gorgeous revamped dining room table and lovely knock-off Restoration Hardware pillows. (I'm pretty sure my project was the easiest one out of the bunch -- drink lots of lemonade, peel off the labels and stick flowers in the bottle...) I'm constantly wowed by all the talent out there in blogland. It's totally inspiring me to wield a power tool (don't be scared, hubby!).

Thanks, Christina!