We have a nice big wall in the kitchen that was begging for a gallery of photos. I love the look and how much latitude you have to make it personal and unique. The blogosphere is full of gorgeous gallery walls for inspiration that are all different but all beautiful:
All other photos from Decorpad
But I was a little nervous to tackle it myself. I contemplated it for a while, but was stricken with indecision. I envisioned putting dozens of nail holes in the wall that the hubs would have to fill when all was said and done.
But that big wall kept staring at me, imploring me to give it a shot. Since I'm not great at visualizing something, I knew I couldn't just launch into it without a plan. So I grabbed some old wrapping paper to make templates.
I had two chunky, matted 8x10 frames I wanted to use, so I started with tracing them onto the backside of the wrapping paper and hanging them up on the wall with Scotch tape.
I had two chunky, matted 8x10 frames I wanted to use, so I started with tracing them onto the backside of the wrapping paper and hanging them up on the wall with Scotch tape.
Then, I grabbed some random 5x7 and 4x6 frames I had around the house and traced them to make templates. I arranged them around the 8x10 frames, trying to keep even spacing and vary the horizontal and vertical orientations. Luckily, the Scotch tape allowed me to pull things off and re-stick them easily without damaging the wall.
I ended up with this:
What's on the back of the paper? Dinosaurs.
Once I knew how many frames I needed and how big they needed to be, I headed out to Target (where else?) and stocked up on some more that would coordinate with the ones I had.
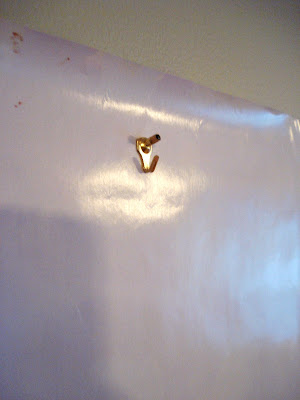
Then began the fun part -- putting holes in the wall. For each frame, I measured how far the hook was from the top of the frame...
...and then measured and marked that on the paper template. I actually put the nail in right into the paper template, then pulled it off.
Then, I hung each frame. I do admit, once I stepped back and looked at it, I did tweak some placement a little (but luckily those holes are still covered by the frames. Don't tell hubby...). I also decided to add a frame on the bottom left that wasn't in my original layout.
I was a little nervous about mixing wood tones, but I think it still looks cohesive (except that really light one in the center, which I'm planning to sand and stain a shade darker).
It fills the space much better than just the two big frames alone.
Want to take a virtual tour of the photos in the frames? Of course you do! (Some of the photos have changed since that last shot above).
For photos, I used a combination of photos of us and landscape shots. The hubs standing on top of Mount Battie in Camden, and one of our favorite lobster shacks on Orrs Island (both in Maine).
Two beautiful and very different beaches: Aruba's Palm Beach on top, and Small Point Beach in Maine.
Clockwise from top, a canal in Venice, lily pads on Webb Lake in Maine, a found pair of flipflops at Popham Beach State Park in Maine. (Not in the shot is a picture of the hubs and I from our engagement session, on the left. It's the same as the shot included in my Valentine's vignette, so I decided you all didn't need to be objected to its lovey-doveyness twice).
And this is me, checking out the scenery (or pretending to, because I didn't have any quarters!) at Land's End in Maine, of course. This photo was actually taken on my birthday in January, when it was unseasonably warm -- I actually put my feet in the ocean!
Making this gallery wall was easier than I thought it would be, and I love the end result. And I definitely like the ability to switch out the photos when I get bored with what's there -- a simple and cost-effective way to refresh the room on a whim.
If you're pondering trying out this trend, go for it! It's not as scary as it seems.
Have you already made a great gallery wall? Share it in the comments below!
Also, I invite you all to like Heart Maine Home on Facebook!


1 comment:
I LOVE your gallery wall! Also, your wrapping paper idea is pure genius.
Post a Comment