Apr 30, 2012

More painting...

Hey everyone! Hope you had a great weekend!

What did I do this weekend? Well, I painted the living room! Remember how I was kind of bummed about the beige overload goin' on in there?


A couple weeks ago, I mentioned I finally picked a new color -- a blue-gray by Behr called Misty Morn. Two weekends ago, I painted our dining room-turned sitting room the same color, but still hadn't gotten to the living room.

On Saturday, the hubs and I moved all the living room furniture out into the sitting room. This was the scene at my house Sunday morning -- a living room nearly empty and ready for a new coat of paint.


With the sectional in the sitting room, I can see how it will look against the blue walls. I think I'm going to like it a lot!


I managed to paint the whole room -- two coats! -- in one day. And man, my arms and back are sore! But I'm so happy to have this painted and can't wait to see it with all the furniture back in! I'll have some pictures for you soon.

Meanwhile, the rest of our house is a complete disaster. Like the office, which is also full of stuff from the living room:


I cannot wait to get things back in order.

Oh, and before I go, I'm so happy to say that my DIY rope knot was featured on The DIY Showoff's Project Parade!! I've gotten a lot of new visitors, so hello and welcome to you all -- I hope you'll stick around for a while. :)

Happy Monday!

Apr 19, 2012

Rope knot bookend {DIY}

Hey, all! Hope you had a good week. TGIF!

I recently crossed a DIY project off my list, something I'd been looking to tackle for a little while: making one of these decorative rope knots.


It's called a monkey fist knot. Ever since I decided last spring to redo the office, I got the idea of using some nautical elements, and I just loved these knots -- but not 48-dollars-love, if you know what I mean. Once the office bookshelf makeover was finally complete, I had a nice place to display one, so I decided to get to work on it.

It took me a while to get the hang of it, but once I did, I realized it's really not that hard. I have a tutorial for you so you can give it a try too!

First, you'll need to stop by your local hardware/home improvement store to pick up some rope. Both Home Depot and Lowe's sell it by the yard. I opted for some natural manila 5/8-inch rope from Lowe's. I got 15 yards to make sure I had enough -- you probably could get away with less, but I found it easier to make the knot loose, so I liked having all the extra. It cost 58 cents a yard.

You'll also need something to support the center. I used this foam ball. If you wanted to make a doorstop or paperweight, you could use a tennis ball that you cut and filled with rocks.


What follows is my tutorial in photos, but if you need more, I used this video to learn the steps (skip to 1:57 to see the tutorial portion -- I didn't even listen to the sound, just watched it). I hope you enjoy my awkward hand positions as I try to hold the rope while also taking pictures :)

Start by taking the rope in your hands, with your left hand about 6 or 7 inches from the end of the rope.


Coil the rope in your left hand until you have four loops.


Pull the rope straight down to the bottom of the loops...


...and wrap it around the bottom of the three loops.


Bring it up and wrap it around the top. Do this until you have three loops on the top.


You're almost there!

So, now you have two sets of loops. The end of the rope should now be hanging down to the floor. Take the end and stick it in the space between the two sets of loops, like so...


...and then pull it all the way through.


This is the trickiest part. You want to wrap the rope around the outside of the three loops on the side that's facing away from you, and then pull the rope through the hole on the bottom, shown with arrows here.


And then repeat, so you're making more loops over the top.


Do it until you have three loops in the front like this and the end of the rope is coming out the back.


Sooo close!


Now, it's time to insert your ball.


But it still looks kind of rough, doesn't it? Now comes the really fun part -- tightening the knot. Essentially, you just go around and around the knot, pulling each loop tight. You'll have to do this a few times to get it tight and symmetrical.


I made a little video so you can see how to tighten it. I apologize for how dark it is!


Once it was all tightened, I cut one of the rope ends really close to the knot...


...tucked the end just under one of the loops and hot-glued it in place.


I made a loop with the other end and also hot-glued that in place.


And it's done!


It's holding up some books on our office bookcase. I'm loving the texture it adds.


I can't believe those stores charge nearly $50 when all it took me was $9 and a little time! I'm totally addicted to them now...I want to make a zillion!


I found that this rope shed little pieces, so you'll probably need to vacuum and brush off your clothes after you're done. :)

If you give making this knot a try, I'd like to hear about it!

Linking up!


HookingupwithHoH

The Shabby Nest


DIY Show Off Project Parade


Join  us Saturdays at tatertotsandjello.com for the weekend wrap
up           party!


UndertheTableandDreaming


Chic on a Shoestring Decorating


Apr 16, 2012

The sitting room is painted

Hello, hello! Hope you all had a good weekend. I got an extra day off on Monday for Patriots Day, which we celebrate here in Maine. I spent it gettin' my paint on in the former dining room/soon-to-be sitting room.

Last we left off, we had a bazillion paint samples on the wall, and the hubs and I each had a different favorite.


So, what color did we pick? Behr Misty Morn!

I feel like I get my way a lot of the time when it comes to house decisions, so I decided to go with the hubs' favorite. I was nervous it would be a little too dark. Well, I have to give the hubs major props, because the color is perfect!


I'll take better pictures another time, but even in this low-light photo, you can see how much brighter the room is sans-maroon walls.


Our plans are to paint the living room the same color, but this weekend I just focused on the three walls that were maroon. It took a coat of primer and two coats of Behr paint + primer in one to cover the red. Getting rid of the red walls also checks off one of my home goals for the year!

In other news, the lovely Christina at Christina's Adventures featured my little chair makeover!


Thank you, Christina! She hosts a weekly link party for DIY projects and crafts under $20...you should definitely stop by! It's amazing what people can do with things they have on hand, some creativity and a little elbow grease.

Apr 13, 2012

Feelin' the blues


No worries -- I'm not feeling sad or anything! Well, only a tad sad over my trouble picking a new paint color for the living room. I always get so excited about picking paint colors in the beginning...then I end up with a zillion swatches and samples on the wall and get a little discouraged.

As I mentioned earlier this week, we have plans to turn our dining room into a sitting room, and paint both the living room and the sitting room the same color. The rooms are open to each other, but separated by the stairwell. Here's a look at it (decorated at Christmastime!):


We decided to go with a blue that's got a little gray undertone in it. But, as you can see, we had to try out a lot of colors...


But we did pick a couple favorites: Offshore Mist and Misty Morn, both by Behr.


I'm leaning towards Offshore Mist, while the hubs likes Misty Morn. Of course, after I snapped these photos, I put three more samples on the wall. I'm keeping those Home Depot paint guys busy!

It's been really tough to pick a color, since they look completely different in the beige living room and the maroon dining room. Don't they all look practically white here?


I found images of both colors online. Here's Offshore Mist...


And Misty Morn...


I've been pinning some inspiration photos lately for both the living room and the sitting room. I love how the blue walls and green curtains look here, but I think it's a little too glam for my style.

Source: hgtv.com via Mindy on Pinterest


This one's glam, too, but so gorgeous! I love the chunky crown molding against the blue walls.


We've got black furniture in our living room, so I like how this photo shows how it would look against a blue wall. I like it!


Source: houzz.com via Mindy on Pinterest


Light and airy with lots of neutrals...


More black accents...


I'd love to use some coastal elements in the living room and/or sitting room. I love this rattan coffee table!


I love the textures in here and the little details, especially the window shades and the rope holding that pendant light. And those chairs!

Source: bhg.com via Mindy on Pinterest


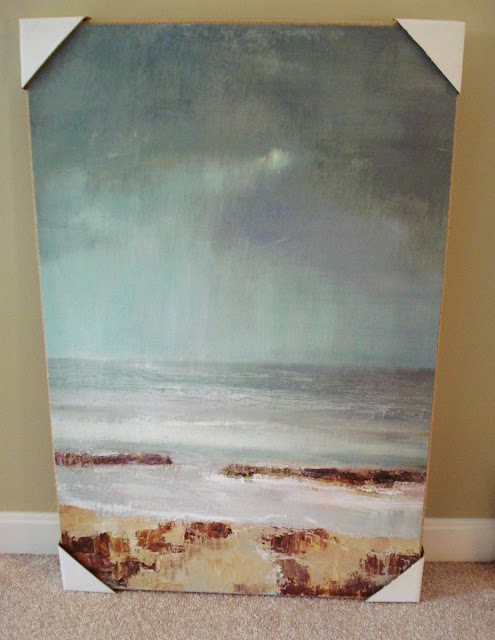
I saw this mood board on Seventh House on the Left for a cool and coastal living room and it was like they made it for me! It's got a beige sectional (check), a blue-gray wall color (soon-to-be-check), and a coastal painting that happened to look a lot like the one I just bought on impulse at HomeGoods.


I can't wait to pick a paint color and get to work! Wish me luck...