Jul 13, 2011

A garden arbor and mason jar lanterns


I've got weddings on the brain lately -- we just went to one this past weekend (and it was fabulous!). Actually, this blog is really all because I had so much fun planning our wedding, DIYing decorations and talking with other brides (both in person and on theknot.com) that when it was over, I really missed being creative and sharing ideas with other people just as passionate as I am. I love being part of such a fun and creative group of shelter bloggers, swapping ideas and tips and encouraging each other!

Our wedding was over a year ago now, but it's nice to have a few reminders of that day around, like the wedding shadowbox I made.


We got married under a birch arbor the hubs made himself. I showed him some pictures of arbors I liked, and we talked about how big we wanted it. He cut the birch from his parents' property and used screws to hold it together. But the pieces came apart more or less easily for transporting.


I love that we can have it as a keepsake.


Photo by Clare Norton

It's got a place now in our backyard.


Next year, I plan to add some flowers around it, including some vines that will climb up and up. And maybe I'll add a little bird bath.

But for now, I used something I had on hand -- a couple pots of annuals and my mason jar lanterns. They make a pretty cute addition, don't you think?


There were supposed to be five jars, but I broke one. I actually put that L.L.Bean picnic blanket that usually hangs out on the porch underneath to try and break the fall in case another jar took a tumble. But then I thought it looked like a cute little picnic setting, so I left it.

I bought most of those jars from a flea market vendor, and I use them around the house as lanterns and seashell holders. I originally had more than 70, but I sold all but about a dozen of them.

Photo by Clare Norton

They just look so pretty with only a few rocks and a candle.


I hung them with some fishing line -- and I also got eaten alive by mosquitoes the whole time. Just picture me on a step stool on uneven ground, trying to hold a jar and tie two pieces of invisible fishing line at the same time, while flinging my ponytail around to keep the mosquitoes away from my face. I'm pretty sure my neighbors think I'm totally nuts.


But the end results were worth it!


I wouldn't leave these up all the time, since the jars would fill with rain and may blow around too much in stormy weather. But if I lived in Cali or some other place with picture-perfect summer weather, I most definitely would.


I had everything I needed on hand for this garden addition, so it was free. But even if you wanted to recreate it, it wouldn't cost you much, as long as you had access to some free birch and were handy with a saw and a screwdriver (or have a partner who is!). Mason jars are readily available at flea markets or even Goodwill for only a couple bucks each, rocks are pretty cheap at Target or a craft store (or even free if you have a place to collect them) and everyone has votives lying around.

Our backyard looks like a romantic secret garden with the addition of the arbor and the lanterns. I love it!


Linking up!


Photobucket


UndertheTableandDreaming


Jul 8, 2011

Summer bedding makes me smile

Remember a little while back I was drooling over fresh, white, comfy bedding?

Well, the hubs wasn't such a fan of white bedding, so we compromised.


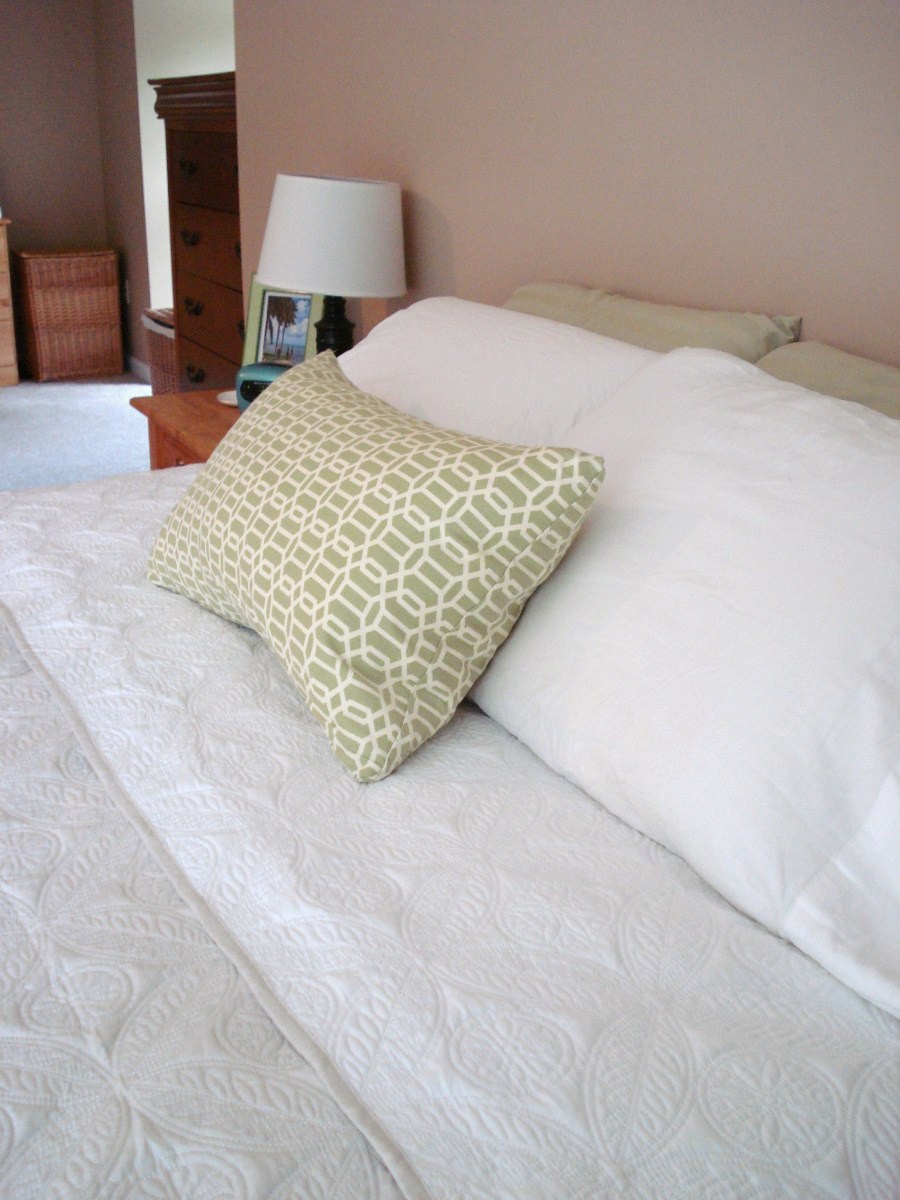
We swapped out our heavy, dark brown comforter for a thin, beige coverlet. It's from Target, part of the Springmaid collection. I like the quilted design, and luckily so does he! (He told me that some of them looked like "old ladies' winter jackets." Ha!)


To go with the new coverlet, I picked up a couple white pillow cases while I was at Target and a white bedskirt. I wanted the bedskirt that matched the coverlet, but it was like $40, and the white one was only $15!


The coverlet is reversible and the other side is white, so maybe someday I'll just flip it around and see what the hubs says...


Here's what it looked like before with the dark brown bedding.

BEFORE

And now...

AFTER

I'm really loving the fresh, summer look. Makes me want to keep it year-round.

Linking up to Thrifty Decor Chick's Before and After party!


Have a great weekend!

Jul 6, 2011

Festive strawberries for the Fourth


Happy Wednesday, everyone! I hope your short work week is going by quickly.

So, I spotted these Fourth of July strawberries in the blogosphere, and I just had to make them -- even though by the time I saw them, it was too late to make them for the Fourth.

Coley of What You Make It featured these adorable strawberries last week, and I found them through At the Picket Fence, which posted a link to Coley's blog on their Facebook page (phew! Catch all that?). Luckily, I had everything I needed on hand -- leftover strawberries from my jam- and pie-making adventures, white chocolate chips and blue sprinkles.

I started by giving the strawberries a nice washing and drying...


I mixed white chocolate chips with a little shortening, after seeing a recipe for fruit dip on the chip bag. Then, I gave my strawberries a little dunk and swirl...


And then dipped them in some sugar, using the shot glass method that Coley describes (and yes, those are pink sprinkles...I ran out of blue so I had to switch!). And yep, that shot glass came home with us from our Quebec anniversary trip.


Then, I laid them all out to cool on some wax paper.


Aren't they adorable? Coley is right...if you don't find them cute, there's something wrong with you!

They came into the office with me today. Hopefully my coworkers won't mind eating Fourth of July strawberries two days late -- or that half of them are actually pink. The pink ones actually made me think of how cute these would be for a baby shower. And green sprinkles at Christmas would be perfect!

Thanks to Coley for sharing her idea and giving me something easy and fun to do with all my extra strawberries. :)

Jul 5, 2011

Fourth of July recap and office progress


Hello everyone! I hope you had a fantastic Fourth of July weekend -- we did for sure!

I spent some time at one of my favorite Maine beaches...


...Caught a great Main Street parade...


...Enjoyed some yummy gelato -- that's half peanut butter cup, half mocha s'mores in case y'all are curious :)


...And capped it with some of the hubs' famous chicken wings.

Famous because we love them!

If you're a fan of Heart Maine Home on Facebook, you already know that I went strawberry picking last week. Look at those tasty, juicy berries! Pretty sure I could eat strawberries until I exploded...


This weekend, I turned those strawberries (and some rhubarb) into this...


I'd never made a strawberry-rhubarb pie before, and I thought it came out pretty good!

I also made some jam for the first time. It wasn't very hard. I haven't tasted it yet, so I hope it's edible good.


All in all, a perfect Independence Day weekend!

I have to apologize to you guys -- I haven't been doing much crafting lately. Summer fun has just been too tempting for me! But, I do have an office addition that I've been way overdue in showing you. We finally got our new desk for the office!

We bought it months ago from Staples, and the hubs spent about two hours putting it together before he discovered a giant chip in the top. We decided this office rehab is just cursed, considering our purple-paint fiasco, and now a damaged desk.


Luckily, the company that makes the desk (Sauder) makes it super simple to order replacement parts on their website. I expected the part to come UPS, but instead, I got a call from some trucking company asking to arrange a delivery, since the part was coming via 18-wheeler! A truck that size wouldn't make it out of our little dead-end road, so instead they asked me where in our rural Maine town a truck that size could meet me. The only place I could think of that could accommodate a truck like that? The fire station.

So, one morning I drove to the fire station and met this giant truck just to pick up a new top for our desk. The box was nearly six feet long and more than 50 pounds (thank goodness for the nice truck driver who put it in my car for me!).

Proof that this actually happened...


Excuse the crummy phone photos...

With the new piece in hand, the hubs was able to finish putting the desk together. Et voila!


I know it doesn't look it in this otherwise empty room, but it's biiiig. 


We picked this one because it was in our budget and it had everything we wanted: a keyboard tray...


lots of storage (look! Two whole drawers for filing, and even one is empty!)...


and lots of work space for the hubs while he's paying bills and planning his brewing recipes...

Don't mind the changing computer background...

Now keep in mind that it's still very incomplete...it needs a lamp, some better office accessories on top and a little electronic organization (i.e., ways to hide all those cords, routers, receivers, etc.). But it's definitely an improvement over what we had. Remember that?
And now...


As much as I'd love a cute little office chair, the hubs is all about practicality -- and since this is mainly his work space, I suppose he should get to pick what he sits in. :) 

Finally, our office overhaul is making some very slow progress. We've already painted the walls from pretty pink to moody gray, and now we've got an actual desk. But there's still lots on our list:

  • Accessorize the desk with a much-needed lamp and other necessities (the hubs has already authorized a lamp purchase...yessss!)
  • Refinish that free bookcase we nabbed
  • Switch out the ceiling fan for a snazzy new fixture
  • Take down those roman shades and get some curtains (I'm thinking I'll DIY them)
  • DIY some floating shelves for extra storage
  • Finish with some wall art

The not-fun stuff will be organizing all the papers and stuff that hasn't made it to the desk yet, and cleaning out the crazy-messy closet. Do you blame me for putting this off?

Scary!

Once again, here's a look at my mood board for the office...


This has already evolved since I first put it together, so stay tuned to see what happens! (But don't hold your breath...it might be a while...).

Linking up!