Feb 13, 2011

My first gallery wall

We have a nice big wall in the kitchen that was begging for a gallery of photos. I love the look and how much latitude you have to make it personal and unique. The blogosphere is full of gorgeous gallery walls for inspiration that are all different but all beautiful:


All other photos from Decorpad 

But I was a little nervous to tackle it myself. I contemplated it for a while, but was stricken with indecision. I envisioned putting dozens of nail holes in the wall that the hubs would have to fill when all was said and done. 

But that big wall kept staring at me, imploring me to give it a shot. Since I'm not great at visualizing something, I knew I couldn't just launch into it without a plan. So I grabbed some old wrapping paper to make templates.

I had two chunky, matted 8x10 frames I wanted to use, so I started with tracing them onto the backside of the wrapping paper and hanging them up on the wall with Scotch tape. 

Then, I grabbed some random 5x7 and 4x6 frames I had around the house and traced them to make templates. I arranged them around the 8x10 frames, trying to keep even spacing and vary the horizontal and vertical orientations. Luckily, the Scotch tape allowed me to pull things off and re-stick them easily without damaging the wall.

I ended up with this:


What's on the back of the paper? Dinosaurs.


Once I knew how many frames I needed and how big they needed to be, I headed out to Target (where else?) and stocked up on some more that would coordinate with the ones I had. 

Then began the fun part -- putting holes in the wall. For each frame, I measured how far the hook was from the top of the frame...


...and then measured and marked that on the paper template. I actually put the nail in right into the paper template, then pulled it off.


Then, I hung each frame. I do admit, once I stepped back and looked at it, I did tweak some placement a little (but luckily those holes are still covered by the frames. Don't tell hubby...). I also decided to add a frame on the bottom left that wasn't in my original layout.


I was a little nervous about mixing wood tones, but I think it still looks cohesive (except that really light one in the center, which I'm planning to sand and stain a shade darker). 

It fills the space much better than just the two big frames alone.


Want to take a virtual tour of the photos in the frames? Of course you do! (Some of the photos have changed since that last shot above).


For photos, I used a combination of photos of us and landscape shots. The hubs standing on top of Mount Battie in Camden, and one of our favorite lobster shacks on Orrs Island (both in Maine).


Two beautiful and very different beaches: Aruba's Palm Beach on top, and Small Point Beach in Maine.


Clockwise from top, a canal in Venice, lily pads on Webb Lake in Maine, a found pair of flipflops at Popham Beach State Park in Maine. (Not in the shot is a picture of the hubs and I from our engagement session, on the left. It's the same as the shot included in my Valentine's vignette, so I decided you all didn't need to be objected to its lovey-doveyness twice).


And this is me, checking out the scenery (or pretending to, because I didn't have any quarters!) at Land's End in Maine, of course. This photo was actually taken on my birthday in January, when it was unseasonably warm -- I actually put my feet in the ocean!


Making this gallery wall was easier than I thought it would be, and I love the end result. And I definitely like the ability to switch out the photos when I get bored with what's there -- a simple and cost-effective way to refresh the room on a whim.


If you're pondering trying out this trend, go for it! It's not as scary as it seems.

Have you already made a great gallery wall? Share it in the comments below!

Also, I invite you all to like Heart Maine Home on Facebook!

Feb 10, 2011

DIY: Paint swatch art

With a house full of walls to fill, I'm always on the lookout for cheap and cute art. When I saw Joi at Nuestra Vida Dulce's fun and modern-looking paint swatch art, I wanted to give it a shot too. I have a ridiculously embarrassing amount of paint swatches, so I was happy to put them to good use.

Joi used uniform squares to make her art, but I decided to try something a little more varied. First, I laid out all my swatches and picked a palette of greens, blues, grays and creams that were all on the cool side. Then, I used my rotary cutter, grid and mat to cut the swatches into various squares and rectangles in one-half-inch increments 2" and less -- e.g., 1" x 1.5", 0.5" x 0.5", 2" x 0.5", etc. -- mostly because that's how my grid is arranged.


I took the insert from an 8" x 10" frame and flipped it over to the white side, then measured in from the sides to make a 5" x 7" rectangle in the center. Then, I just started arranging the squares so they fit into the 5" x 7" rectangle. I didn't really have a process, except I tried not to get two of the same color next to each other, and tried to vary up the order of the sizes (i.e., not get too many smaller squares next to each other).


Once I had it looking like I wanted, I started sticking them to the paper using scrapbooking adhesive. I worked from one side to the other, lining them up as closely as I could to avoid seams. Luckily, the adhesive wasn't so sticky that I was able to peel off squares easily and readjust if I needed to. 

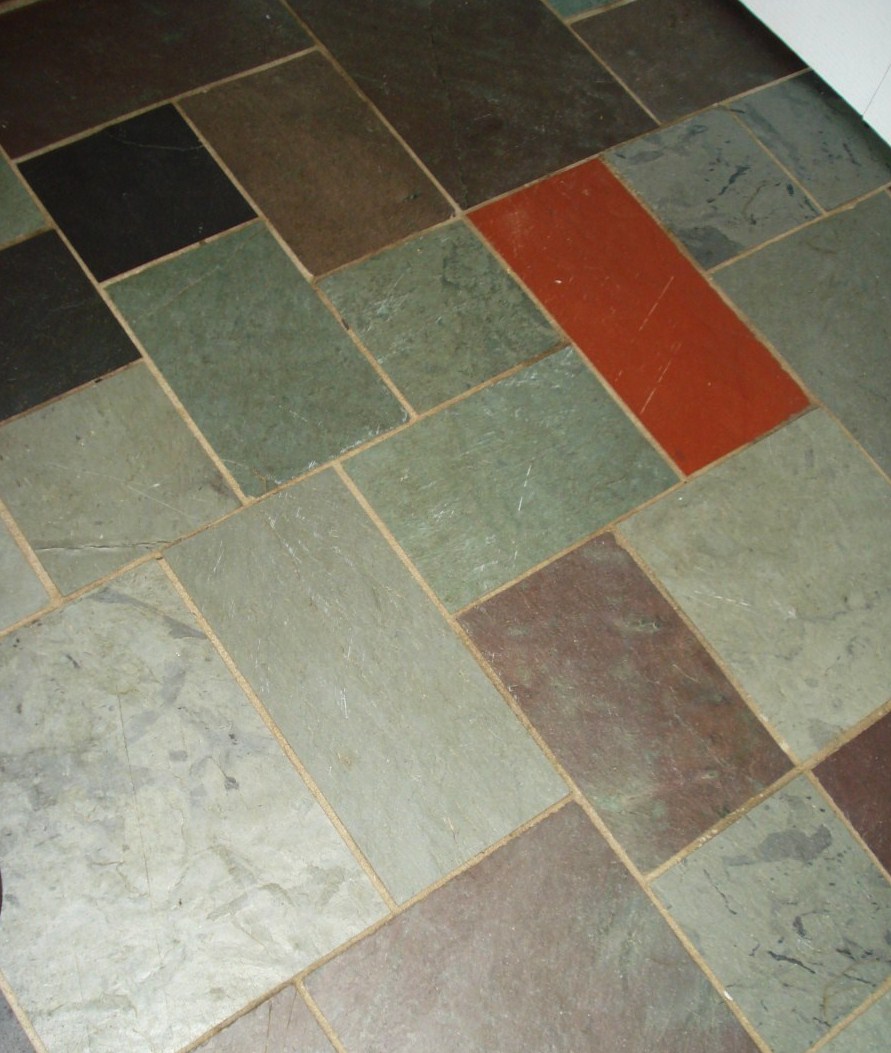
I decided to include one small burnt orange square, to mirror the design of our slate floor in the entryway (which actually has a couple orange tiles, but it's mostly blues and grays). Many of the paint swatches I had were similar in tone to the floor, since we used that as inspiration for our color scheme.


Here it is matted and hung in the kitchen.


If you get up close, you can see a few tiny gaps between the squares -- it was ridiculously hard to get all my edges straight, even with the grid and rotary cutter, and line them up perfectly. I still love the way it looks, though.


All in all, it was a fun project, but it took a lot more time than I anticipated to arrange the layout. I think Joi had the right idea using uniform squares -- that would have taken a lot less time! I think I'll try that next time. I might also try making the squares bigger than I want them and overlapping them to prevent gaps. I still have plenty of swatches left over, so I might make another piece for the living room.

The best part? All it cost was the frame. I bought this one at Target for $12 because I liked the size and the large mat, but you could easily repurpose a frame you already own or buy something cheaper at a thrift store. 

What do you think? Pretty cute, huh?

Sorry for the bad light. The kitchen only gets diffuse light in the winter, apparently!

I'm linking up to Christina's Adventures' 20 Below Thursday. Stop by and check out all the great under-$20 projects!


I'm also linking up to At the Picket Fence's Inspiration Friday party. Come and get inspired by everyone's creativity!


Feb 8, 2011

Before and after: Our dining room table

Our first major purchase for the house was a dining room table. We had a nice big formal dining room and a dinky four-person table that, though adorable, is pretty old and has seen better days. We shopped around for a high-quality table that was also affordable and didn't find much. Since we knew it'd take some abuse from future children, we wanted something that would last, something solid and made of real wood, not particle board and veneer. We decided to buy an unfinished hardwood table from the Mill Stores, a New England furniture chain that sells lots of unfinished furniture.

We picked out the biggest table they had, with two leaves and a full extended length of 96 inches, plenty of room to seat 10 adults. A 20% off coupon saved us a cool $100, and within a few days the table was in and ready for us to pick up (and as we watched three dudes wheel it out with a dolly, we realized we were totally unprepared to get it out of the car ourselves. Thank goodness for good, strong friends just a phone call away!).

Mill Stores will finish furniture for you, but we opted to save the money and DIY. When I say we, I mean the hubby. This was 100% his project -- the only thing I did was help pick out the stain and get the drop cloth underneath the table. It took a lot more work than we anticipated, with the two leaves and the legs, and multiple coats that needed time to dry. But the end result was totally worth it.

Since we bought the table before this blog, and since it came in pieces that we didn't assemble until they were all finished, I don't have a before shot. This photo from the Mill Stores' website will have to suffice.

The table comes with turned legs, but we opted for chunkier farmhouse-style legs, which you can see below

The hubs sanded everything by hand using 320-grit sandpaper, using a power sander only in a couple spots. Then he applied a pre-stain. 


We picked a dark mahogany stain -- a nice mid-range tone that we felt would outlast trends and be timeless. It also ended up matching the hand-me-down dining room chairs we already had -- score! 


He applied the stain with a rag, putting on excess stain, let it sit for a couple minutes and then wiped off the excess. He let each coat dry for more than a day, and once everything was stained, he applied three coats of Minwax clear semi-gloss poly for a durable finish. He sanded lightly between all coats to ensure everything was smooth.

Here he is, hard at work. You can see that one half is stained and the other is still naked.


 (Please excuse the crummy phone and nighttime photos!)

Ready to see the after? Here it is, in all its extended glory:


Isn't she a beauty? I love the look of the grain.


And the hearty farmhouse-style legs that the store wanted to charge us $100 extra for, but I managed to talk them out of it. They call them Shaker legs.

The hubs busted his butt to get the table done for Christmastime, so we could have our families over for brunch.


And here's what it looks like without the two leaves. (More on that centerpiece another day!)


Didn't he do a fabulous job?

The hubs was nice enough to share his tips for finishing wood furniture:

  • Use a pre-stain, no matter what kind of wood you're working with. It helps the stain apply more evenly and avoids blotchiness.
  • Even if a piece says it's ready to finish, it's still a good idea to hit it with some sandpaper and ensure it's smooth and nothing has been dinged while moving the piece.
  • Use a foam brush for smooth application, and work in slow, even strokes to avoid bubbles.
  • Sand between every coat, and avoid using steel wool, as sandpaper is more effective.
  • Don't be afraid to use lots of poly at the end, but make sure to wait at least 24 hours in between coats. If you want a satin finish, it's best to apply a coat or two of semi-gloss or glossy poly and then finish with one coat of satin. Satin poly tends to be hazy, so a few coats of it will likely obscure the look of the wood grain and appear cloudy.
We're super excited to have a table big enough to host our families and friends, and it has so much more value to us because of all the hard work we (okay, he!) put into it. We still need to invest in some chairs, but we're a little nervous about how long it would take to do all that detail work. We'll see when we decide to tackle that!

Once again, the before:

And the after:


And here's what the dining room looked like with our dinky old table. You can see the leaves of the new table in the background.


I'm linking up to Thrifty Decor Chick's Before and After party. Stop by and see all the amazing transformations!


I'm also linking up to the DIY Showoff Project Parade, so stop by there too and check out the great DIY projects!


Feb 6, 2011

Scoring at Target

Target is my kryptonite. It seems I can never leave that store without coming out with something that wasn't on my list, and lately that something is home-related.

I like to go often (though I probably shouldn't!) and shop the sale and clearance items. There's nothing like the rush of scoring something for half price or even less.

Some of my recent finds:

This yummy soft faux fur throw, on sale for $12.48, down from $24. Right now it's hanging out with our new Target trunk in the bedroom (yes, apparently everything we own is from Target), but it might find its way to the living room.


This cute silver vanity tray that I eyed a couple weeks ago when it was on sale for $10-something and reluctantly put back, since I couldn't really justify it. I don't know how much it was originally, but when I saw it was marked down again to $7.48, I snatched it up. It matches the rest of the silver decor in our bathroom very nicely!


A pair of these fun 5x7 frames to add a pop of color to our nightstands. They were $1.48 each! I'm pretty sure they were close to $10 each regular price. I put two relaxing photos from our Aruba honeymoon in there to conjure up memories of our island escape.


And I love this graphic tablecloth for our small table next to the kitchen. I'd been eyeing this too, but knew we didn't need it. Unless, of course, it was $8.98, marked down from $17.99. (I found it on the website and it's still regular price.) I love how the light blue in it coordinates with the green-gray walls but isn't too matchy-matchy, and the brown and yellow add a fun contrast.


This last item is a ridiculous good price even when it's not on sale. We've been searching for curtains for the bedroom since we moved in. I bought these chocolate Fieldcrest ones that were on sale a while back, and they were beautiful, but the brown didn't match our comforter very well, and, well, it was just too much brown for the room (since the walls are beige and our comforter is solid brown). 

After returning those, I found these green ones online for an awesome price -- $12.74 for the pair. Yes, that's $6.37 for each 84-inch panel. Even not on sale, they're a steal for $14.99. They're thin, but perfect for the bedroom where we already have dark bamboo shades that block the light pretty well. I ordered one pair first to see how they would look in person, and the green color worked well with our green sheets and gave the room a happy, light feel, I think.

(Yes, they're a smidge short, but nothing a few drapery rings won't fix!)

I'm sure they'll be many more Target scores in the future, but to save my bank account and my husband's sanity, I'm going to detox for a little while. It'll be hard, though, not to dream about those items waiting to be snatched up on the clearance racks. Must...resist...!

What have you scored at Target lately?

Meanwhile, I've updated my home tour page and added photos of all the rooms in our house -- check it out here!

Feb 2, 2011

Home goals for 2011

I know we're already a month into the New Year and I'm way behind on coming up with home goals for 2011, but better late than never, right? So here, in no particular order, are our goals for 2011 -- or at least a handful, considering we just moved into the house three months ago and the list seems to be never-ending!

1. Paint, paint, paint!
Since moving in, we've painted the master bedroom, the kitchen, the entryway and the living room. Next on our list is the office (which is currently pink!), and I can't wait to get rid of the two yellow bathrooms.

I know it's weird, but yellow walls just make me a little angry instead of cheerful. 

At some point next year we'll also paint the two extra bedrooms, which are currently mint green and bright blue (with a sports-themed wallpaper border! Yeah...).

2. Put up ledge shelves in the dining room.
We have a big wall in the dining room, and imagining it filled with three ledge shelves and lots of photos makes me super excited.


 I'm eyeing these simple directions from Ana White.

Photo: Ana White

3. Put in a new walkway.
Our house has a somewhat awkward layout -- the garage is perpendicular to the house and obstructs the view of the front door when people drive in, so we've had people coming around the back of the house and up the deck instead of going around to the front. Right now, we have a simple gravel path that's hard to see, hard to walk on and walk to shovel in the winter.

Ahh...look at how sunny and green it is. Now it's covered by three feet of snow...no joke!

We're planning to put in pavers and add visual interest with landscaping -- planters or gardens on either side of the walkway -- to make it stand out and guide people to the proper entrance. We also may put some plants along the other side of the driveway to obstruct the view of the back deck and discourage people from traipsing across the lawn.

There's also no lighting along the walkway, so we want to install overhead lighting on the garage and put in some solar lights along the walkway.

4. Make cute planters for the shed.
As soon as I saw that shed, I knew it would look super cute with planters beneath the windows.


I'm also thinking about the great potting area I could have in there.


5. Buy furniture.
I don't know when or how much we'll be able to buy, but we need a desk, bookshelves, dining room chairs and a real bed frame. I'd also love to put a couple of these Target Mitchell armless chairs and a cute table in the eat-in kitchen area/lounge (we don't know what to call it) to make a fun seating area for chatting with friends over coffee.

(Excuse the bad photo -- it was at night, just after we finished painting this room)


And our master bedroom has a little dormer nook that would make a great home for a comfy chair, a little side table and a cute lamp -- the perfect place to curl up with a good book.

Inspiration:

Our house is still a work in progress (aren't they always?), so I'm sure there's lots more we'll tackle in 2011 -- like putting up more art on the walls and rehabbing some hand-me-down furniture. But those are the top five projects we're planning, and if we can get at least three done, I'll be a happy camper.

What are your home goals for 2011 -- or any goals, for that matter?

I've been working on a few exciting projects I can't wait to show you, but they're not 100% done yet, so stay tuned!