Mar 30, 2012

A crocheted pencil holder {DIY}


It's Friday -- yippee! Hope you all had a good week. The weather here in Maine over the last two weeks has been totally insane. Last week, it was a record 87 degrees...


And then this week, it was snowing.


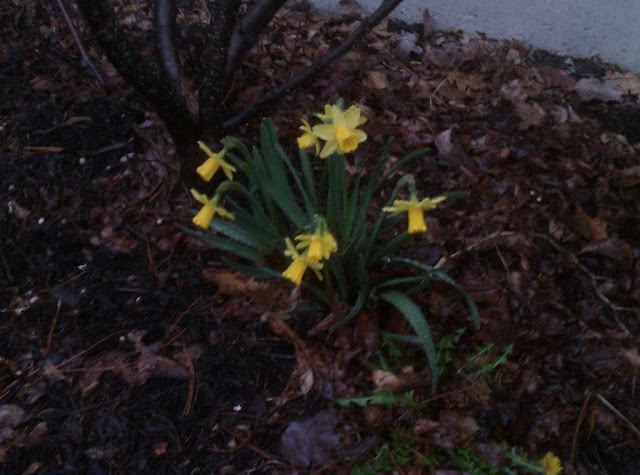
I can't blame my daffodils for thinking it was time to come up. I'm happy they survived the snow...at least for now.


So, I've got a little craft to show you today. I saw these super-cute knitted pencil holders on House to Home and thought...hey, I could do that! Well, okay, I can't knit. But I can crochet. I also had an empty coffee can lying around that I saved for just this occasion.


Let's get right to the finished product, shall we? Ta-da!


I used Vanna's Choice yarn I bought for another project and followed these directions to crochet in the round until it covered the bottom of the can.


Then, I simply went around making single crochets until I made a little sleeve that would fit over the top of the can. The silver of the can was showing through a little, which I didn't hate, but I thought more color would be fun, so I wrapped the can in yellow scrapbooking paper, then put the crocheted sleeve over it.

Initially I was going to just leave it like this:


But it was a little boring, I thought.

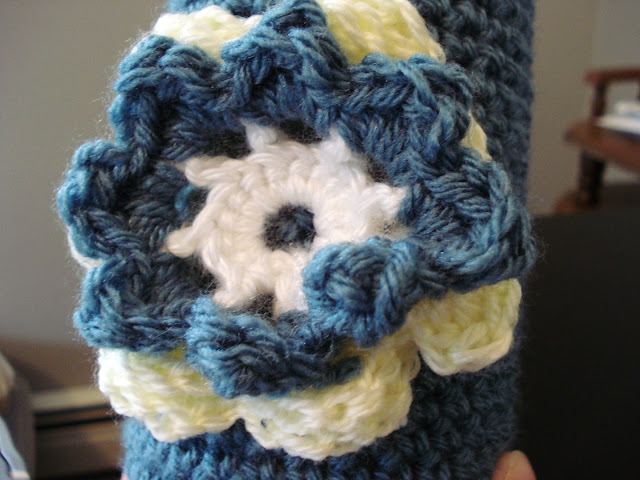
I've been making a bunch of these crocheted flowers since I found this pattern from Beata at Rose Hip, and I thought it'd made the perfect little addition to my pencil holder. I used some white and yellow yarn I had for the center and the other petals.


To attach the crocheted sleeve and protect my hands from the sharp can edges, I folded the top over the lip of the can and attached it using hot glue. Since the can is too deep for pens and pencils, I added some river rocks in the bottom.


It would also be cute to line the inside of the can with some fun paper, but at this point I was too lazy to take off the sleeve and do that, so I'm good with the way it is.


It makes the desk a little more cheerful!


I'm totally obsessed with crocheting these little holders now. How cute would they be for vases and candle holders, especially in the wintertime for adding some coziness and warmth? Oh, and this project cost me absolutely nothing, since I already had the can, the paper and the yarn!

Linking up!


HookingupwithHoH


The Shabby Nest


Somewhat Simple

DIY Show Off Project Parade


Join  us Saturdays at tatertotsandjello.com for the weekend wrap
up           party!


UndertheTableandDreaming


Days of Chalk and Chocolate

Mar 26, 2012

A bookcase revamp in detail


Hey everyone! Hope you all had a great weekend! I meant to be back again last week, but work got busy and it also was super-nice in Maine last week, like record-breaking heat, so I decided to get outside and enjoy it :)

Thanks for all your nice words on my bookcase redo! I thought I'd give you a little more details on what I used to decorate it.


Since this bookcase is in our office, I needed it to me functional...but of course it has to be nice to look at, right? We've got a nice big closet and a desk with four drawers. so I didn't need the bookcase to store much else but books. I picked out books we need on hand, books with some sentimental value, and books I think are pretty :) I also left a little space so we could add books as we need to.

The bottom shelf has our "useful" books -- travel guides, home improvement and landscaping. Holding some of the books up are the hubs' old voltage meter. I really like to add natural elements to a lot of my decorating, so I added some rocks from my collection.


On the next shelf, the hubs' books about brewing beer are nice and handy, propped up by an old insulator and a clearance candlestick from Target that I spray painted turquoise. It was dark brown before. I'm totally loving it in this color!


I've also got some of the hubs' old books about math and engineering. A mask I bought in Venice adds a little sparkle.


Up from that, more books, a bottle of sand from the beach and a nice little wedding photo. I tried to group the books my color as much as I could; I decided to arrange these blue books from light to dark.


A collection of white books is on the next shelf, with two turquoise vases I bought at a local boutique. Actually, one of these vases was the inspiration for the pops of turquoise in this room -- and I had to run out and buy its buddy. A photo of Aruba ties in more blue and just makes me happy to look at. The frame is also a Target clearance special; it used to be gold, but I spray painted it white.


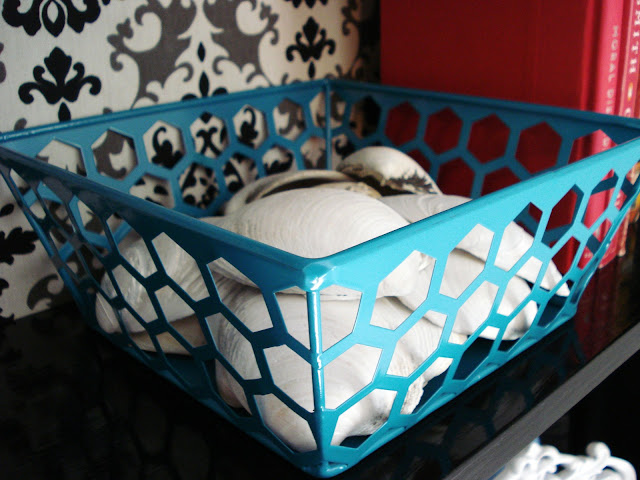
Lastly, the top shelf has a few more books in green and red, and a turquoise fruit basket from Target (do I shop anywhere else??).


The basket is filled with some of my shell collection.


There's lots of great advice out there about decorating bookcases and shelves, but I thought I'd share a few things I like to do:

  • Use natural elements. I love bringing a little nature indoors -- it's timeless, easy and cheap. Natural elements can add texture and color. Plus, they're meaningful for me -- shells (like below) and sand remind me of favorite beach trips, rocks of camping trips. I like to group them in collections for impact.


  • Stick to a color palette. Especially with the graphic background, I used a few colors to keep things cohesive. Turquoise and white feature prominently, along with other blues and greens and a few pops of red. Again, I grouped the books by color to create visual impact, but also repeated the colors on different shelves to tie things together.


  • Add personal elements. Framed photos and other keepsakes make decor personal and unique. Just makes it feel like home, you know?


  • Less is more. Sometimes less can have more impact. I purposefully kept the arrangement airy so it wouldn't compete with the busy background and to keep it from looking cluttered.


Like anything I do in my house, this probably isn't done yet -- I'll be tweaking here and there as the mood strikes. I've already got a couple other things I want to add in there for more color and texture. Stay tuned!

Mar 19, 2012

Office bookcase {before and after}

Hello, hello! Hope you all had a good weekend. It was super-nice out here in Maine...sunny, clear blue sky and in the low 70s. I know that's not everyone's idea of perfect weather, but for this New Englander, it definitely was.

This weekend I also wrapped up a couple projects, including this one I'm about to show you. It's a big check off the office redo list, and I'm super thrilled with how it came out!

Last year I managed to score a solid oak bookcase...for free! The restaurant downstairs from my office had new owners who were renovating, and they tossed this puppy in the Dumpster. Lucky for me, they were nice enough to pull it out again when I professed my interest :)

I'm going to cut to the chase and get right to the after. Ta da!


Here's what we started with.


The bookcase had been given a pretty sloppy stain job, and we weren't feeling the color anyways, so we started by sanding it down. We also had to remove the back because the restaurant had cut a hole in it for some reason. A new piece of plywood cut down to size at The Home Depot didn't cost much at all.

Prying off the old back...

...and pulling out the old staples

We decided to paint it with an oil-based gloss black paint for a super-smooth, super-shiny finish that would also let the wood grain show through. We used this paint from Rustoleum and did two coats.


I really wanted to do something to make it unique, so instead of painting the new back, I decided to cover it with this damask fabric from Joann. It was super easy to do because the back was already off the shelf, so I just used some spray adhesive to stick it on. The only tough part? I didn't have a piece of fabric big enough to cover the whole back, so I had to line up the two pieces just right.

Can you spot the seam?

Here's a better look

The hubs attached the back with little finish brads.

So, it only took like a whole year to get this thing finished and in its new home. Part of that was because the office was a total disaster for a while...it kind of became the dumping ground for Christmas decor, projects in progress, etc. Then it was home to our living room furniture for a couple weeks while we shampooed the carpet in there to prepare for our new sectional. Anyways, I'm just glad the office is cleaned out and there's room now for this lovely bookcase!


I'll tell you more about what's on the bookcase in a later post. But here's a little look...


The office redo is chugging along, but there are still a few things to finish up. Here's a list:

--Hang up the art
--Hang up the curtains
--Buy a new light fixture
--Build some shelves over the desk
--Finish a secret project I'll tell you about soon :)

I'm hoping to get it all done in the next month or so. We'll see!

Linking up!


HookingupwithHoH


The Shabby Nest


Somewhat Simple

The DIY Show Off


Join  us Saturdays at tatertotsandjello.com for the weekend wrap
up           party!


UndertheTableandDreaming


homework


Days of Chalk and Chocolate